
Marquee tool
| box_of_blocks.jpg |
Download the above file and open it in Photoshop.
"Save As" with Lastname_Firtstname_Blocks.jpg into your Network Folder so you do not lose it.
Drawing Rectangular Selections
Using the Rectangular Marquee Tool in its most basic form is easy. You simply click with your mouse at the point where you want to begin the selection, which will usually be in the top left corner of the object or area you need to select, then continue holding your mouse button down as you drag towards the bottom right corner of the object or area. When you release your mouse button, the selection is complete!
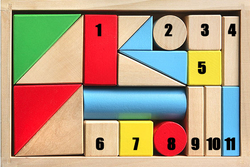
Here's a photo of some wooden blocks:
"Save As" with Lastname_Firtstname_Blocks.jpg into your Network Folder so you do not lose it.
Drawing Rectangular Selections
Using the Rectangular Marquee Tool in its most basic form is easy. You simply click with your mouse at the point where you want to begin the selection, which will usually be in the top left corner of the object or area you need to select, then continue holding your mouse button down as you drag towards the bottom right corner of the object or area. When you release your mouse button, the selection is complete!
Here's a photo of some wooden blocks:
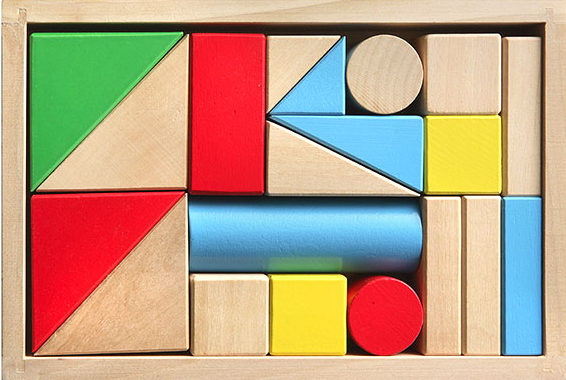
See that large red block in the top row? Let's say I wanted to change its color, a very simple thing to do. Now, if this was Star Trek, I could simply say "Computer, select red block, top row", followed by "Change color to purple", or whatever color we wanted. Unfortunately, reality hasn't quite caught up to science fiction just yet, but that doesn't mean life in this day and age is unbearably difficult. Far from it! Photoshop may not be able to identify the wooden block, since all it sees are pixels, but not only can you and I see it, we can see that it's very clearly in the shape of a rectangle, which means that the task of selecting it is perfectly suited for the Rectangular Marquee Tool.
First, I'll select the Rectangular Marquee Tool from the Tools panel as we saw a moment ago. You can also select tools using their keyboard shortcuts. Pressing the letter M on your keyboard will instantly select the Rectangular Marquee Tool. Then, to begin the selection, I'll click in the top left corner of the block. While still holding down my mouse button, I'll drag towards the bottom right corner of the block:
First, I'll select the Rectangular Marquee Tool from the Tools panel as we saw a moment ago. You can also select tools using their keyboard shortcuts. Pressing the letter M on your keyboard will instantly select the Rectangular Marquee Tool. Then, to begin the selection, I'll click in the top left corner of the block. While still holding down my mouse button, I'll drag towards the bottom right corner of the block:
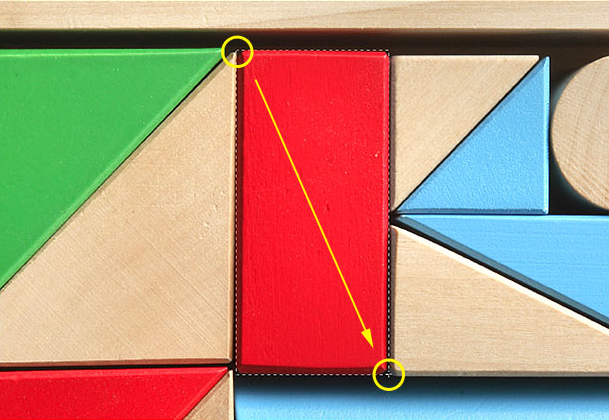
If you find that you didn't begin your selection in exactly the right spot, there's no need to start over. Just hold down your spacebar, then drag your mouse to move the selection where you need it. When you're done, release your spacebar and continue dragging out the selection.
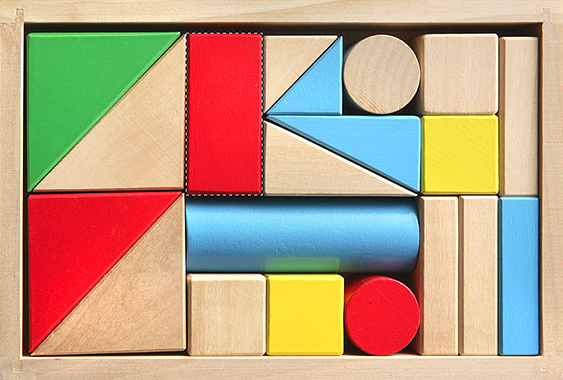
To complete the selection, all I need to do is release my mouse button. The wooden block is now selected (or at least, the pixels that make up what we see as the block are selected), and a selection outline appears around the block in the document window. Any edits I make at this point will affect that specific block and no others:
To complete the selection, all I need to do is release my mouse button. The wooden block is now selected (or at least, the pixels that make up what we see as the block are selected), and a selection outline appears around the block in the document window. Any edits I make at this point will affect that specific block and no others:
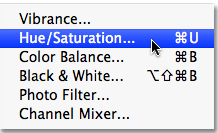
To change the color of the block, we'll use Photoshop's Hue/Saturation image adjustment. To select it, I'll go up to the Image menu at the top of the screen where I'll choose Adjustments and then Hue/Saturation:
This brings up the Hue/Saturation dialog box. I think I'll change the block's color to orange. I know I said purple earlier, but now that I've had a few more minutes to think about it, a nice bright orange would probably be a better choice. Changing the color is as easy as dragging the Hue slider left or right until you find the color you want. I'm going to drag mine towards the right to a value of 28 to select orange. Then, to bump up the color saturation a bit, I'll drag the Saturation slider towards the right to a value of around +25:

When I'm happy with the new color, I'll click OK to exit out of the dialog box. I don't need my selection anymore, so to remove it, I'll go up to the Select menu at the top of the screen and choose Deselect:
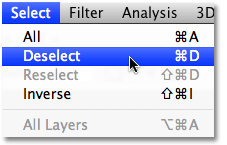
A faster way to remove a selection is with the keyboard shortcut, Ctrl+D (Win) / Command+D (Mac), but either way will work. With the selection outline now gone, we can see that only the area that was inside the rectangular selection outline was affected by the Hue/Saturation adjustment. The formerly red block is now an orange block, while the rest of the photo remains unchanged:
Your Goal
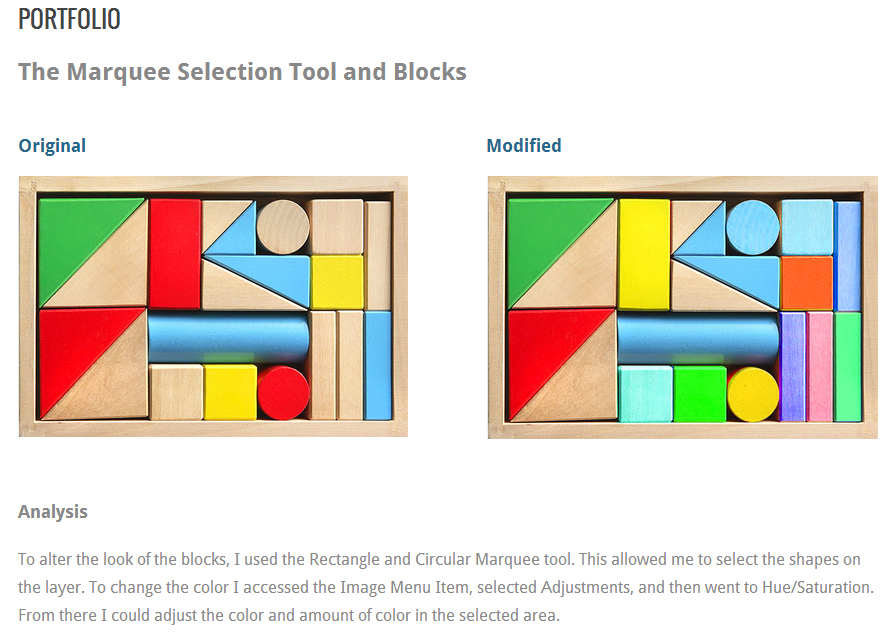
- In your portfolio section of your website, create a title called Marquee Tool as a title.
- Put a "text" header called "Before".
- Upload the original box_of_blocks.jpg file
- You will need to change the color of the 11 blocks indicated below with the Rectangular and Circular Marquee tool using the above described method with Hue and Saturation under the Menu Image - Adjustments - Hue/Saturation.
- Save the file as Lastname_Firstname_Blocks.jpg.
- Add another "text" header called "After" on your website
- Upload the new image
- Add a text box and describe how you used the Marquee Tool to change the picture.
This is how your website should look.
