One Point Perspective
Step 1: Research and practice packet ***Must complete before working on Project***
DO THIS FIRST - We will do this in class
| One Point Perspective |
Step 2: Room Project
|
VVVV This has the rubric and details VVVV
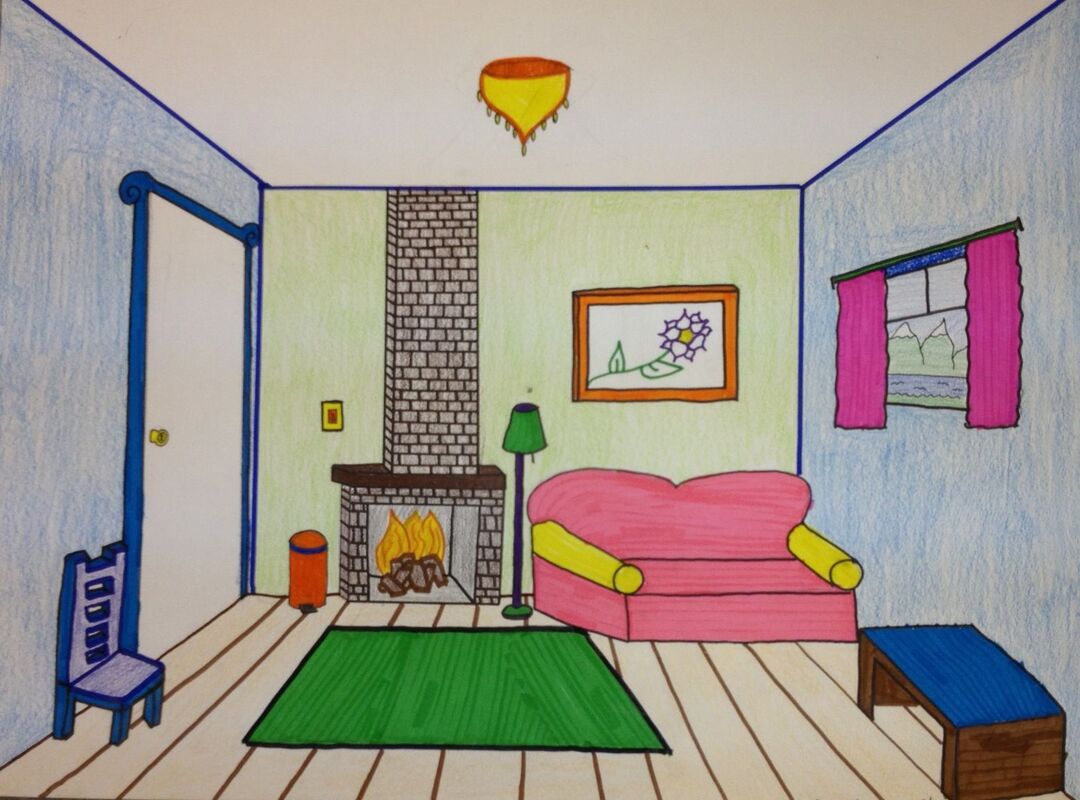
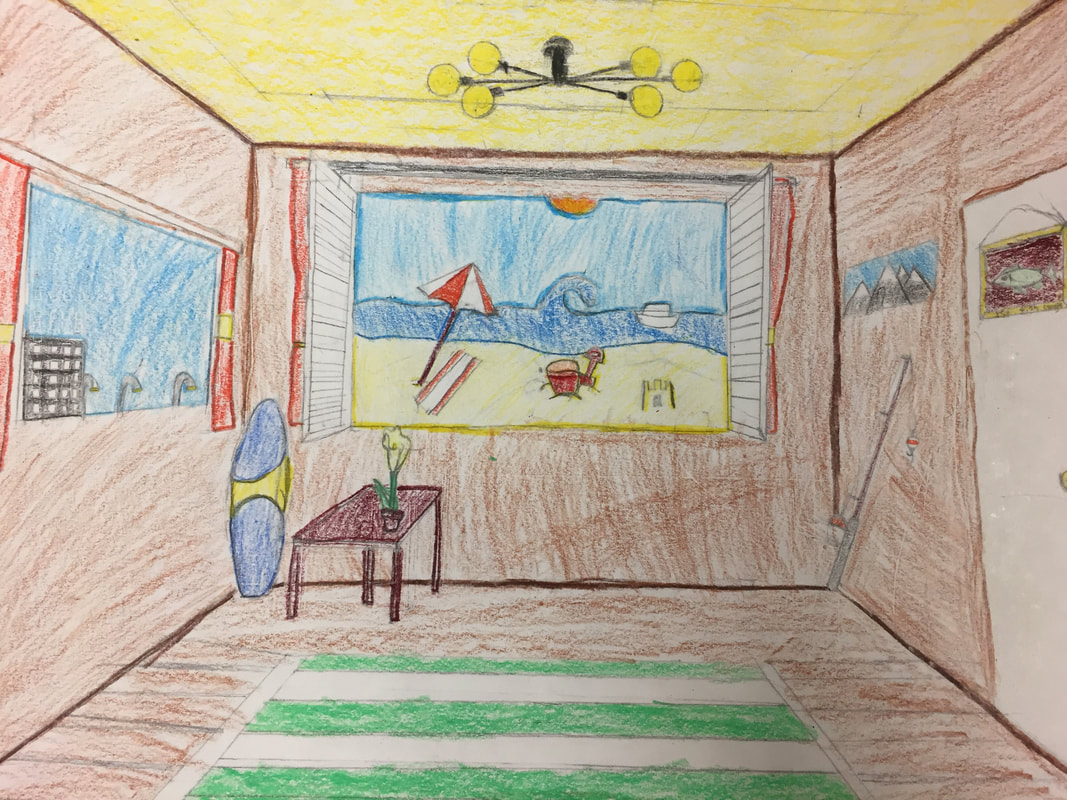
One Point Perspective Room Project
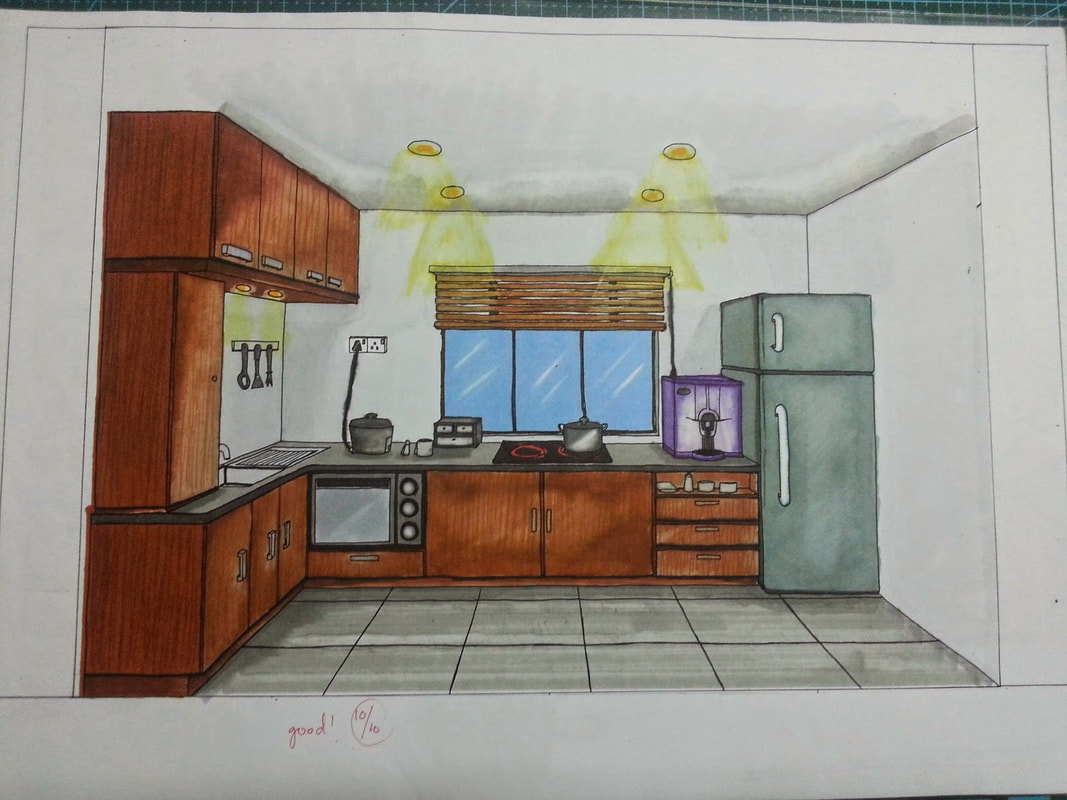
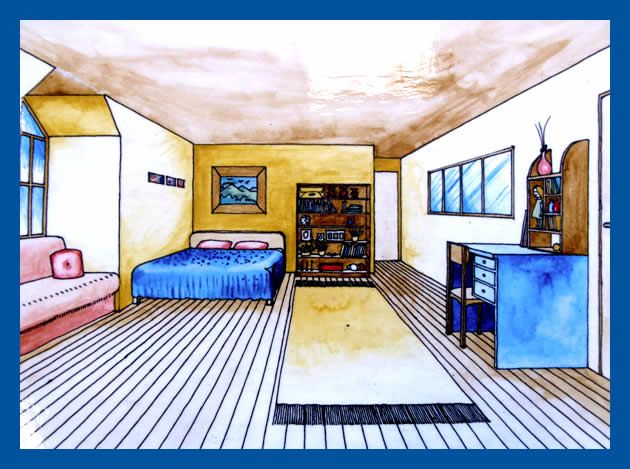
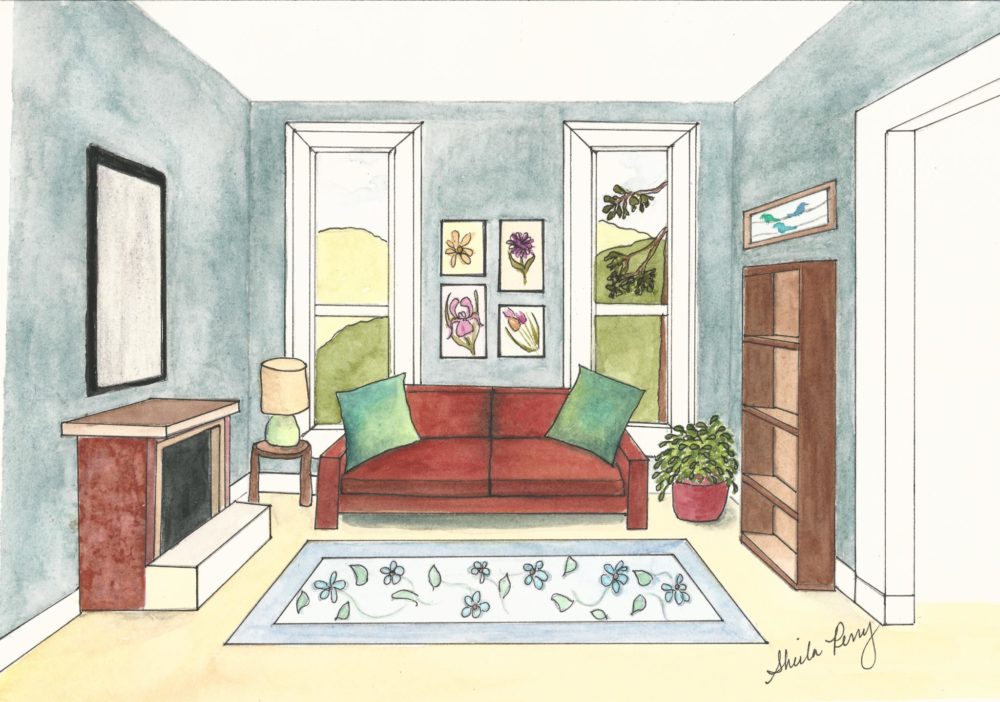
To start the project you will need to follow my guide lines: Bedroom ----------------------------------------- _____ Bed, pillow, blanket/sheets _____ Side table _____ Lamp _____ Window with curtains or blinds _____ Dresser with at least 5 drawers _____ Closet Door _____ Ceiling light _____ Desk with computer/laptop and chair _____ Bookcase with stuff on it _____ 2 shelves with stuff on them _____ Tiled or wood floor Optional _____ Other ______________________________ _____ Other ______________________________ Living Room ---------------------------------------------------- _____ Sofa _____ Chair _____ Coffee table with stuff on it _____ Television stand with drawers and tv on top _____ Wall Art of famous painting...must be identifiable. Write name here _______________________________ _____ Window with curtains or blinds _____ 2 shelves with stuff on them _____ Floor lamps and ceiling lights _____ Opening into the room with a slight view into another room (continue the floor, table, etc) _____ Some kind of plant in a vase _____ Tiled or wood floor Optional _____ Fireplace with mantle shelf _____ Other ______________________________ Kitchen ------------------------------------------------------------------- _____ Counters with kitchen sink _____ Window with curtains or blinds _____ Refrigerator with papers on it using magnets _____ Oven with microwave on top _____ Lower and upper cabinets _____ Ceiling lights _____ Table and chairs or countertop seating with stools _____ Countertop stuff: Choose 3: coffee maker, mixer, bread box, small tv, plant, bowl of fruit _____ 2 shelves with stuff on them _____ Garbage can in an appropriate place (like it was meant to be there _____ Tiled or wood floor Optional _____ Other ______________________________ _____ Other ______________________________ |
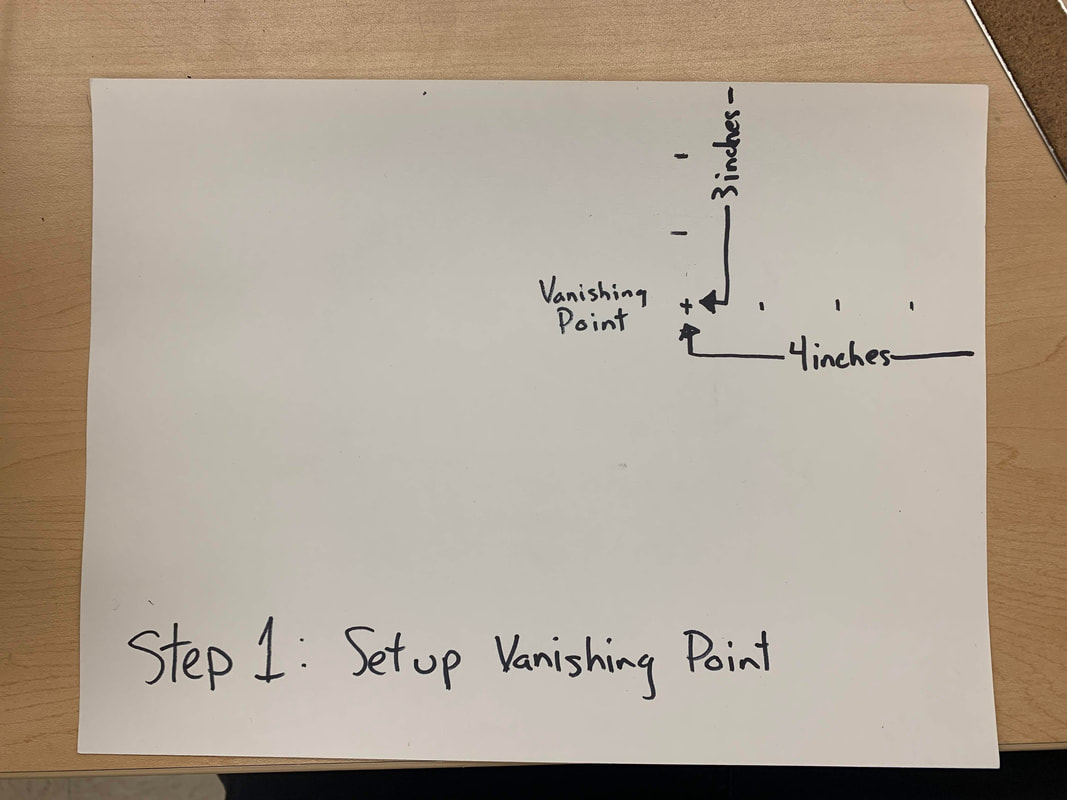
Step 1
Step 2
Step 3
Step 4
| ||