
Haunted House
|
This is how I made it?
|
You will be making a Haunted House. I broke this assignment into two separate assignments to address two sets of different tools and two sets of skills. Start by downloading the background sky.
| hauntedhouse.psd |
|
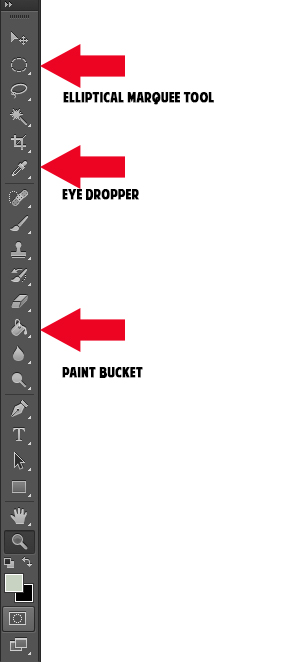
This part involves using the three tools shown to the right, the Elliptical Marquee Tool, the Eye Dropper, and the Paint Bucket.
Open the file.
|
|
Phase Two: The Hous
Open the file you made yesterday.
Download this file and copy and paste the whole layer into your file.
Download this file and copy and paste the whole layer into your file.
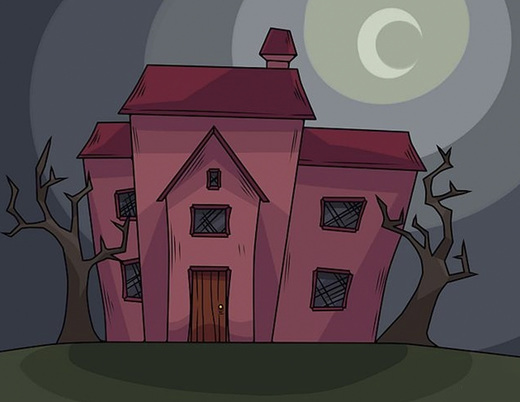
| hauntedhouse_final.jpg |

|
|
|
|
LAYER ORDER IS SUPER Important
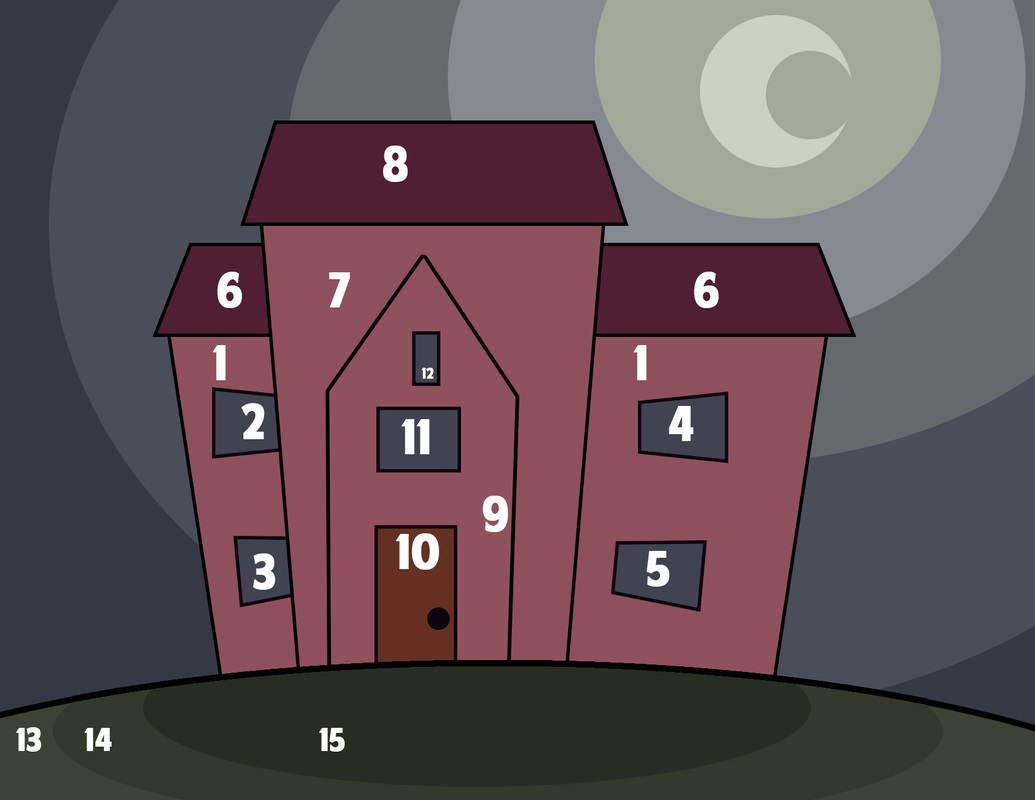
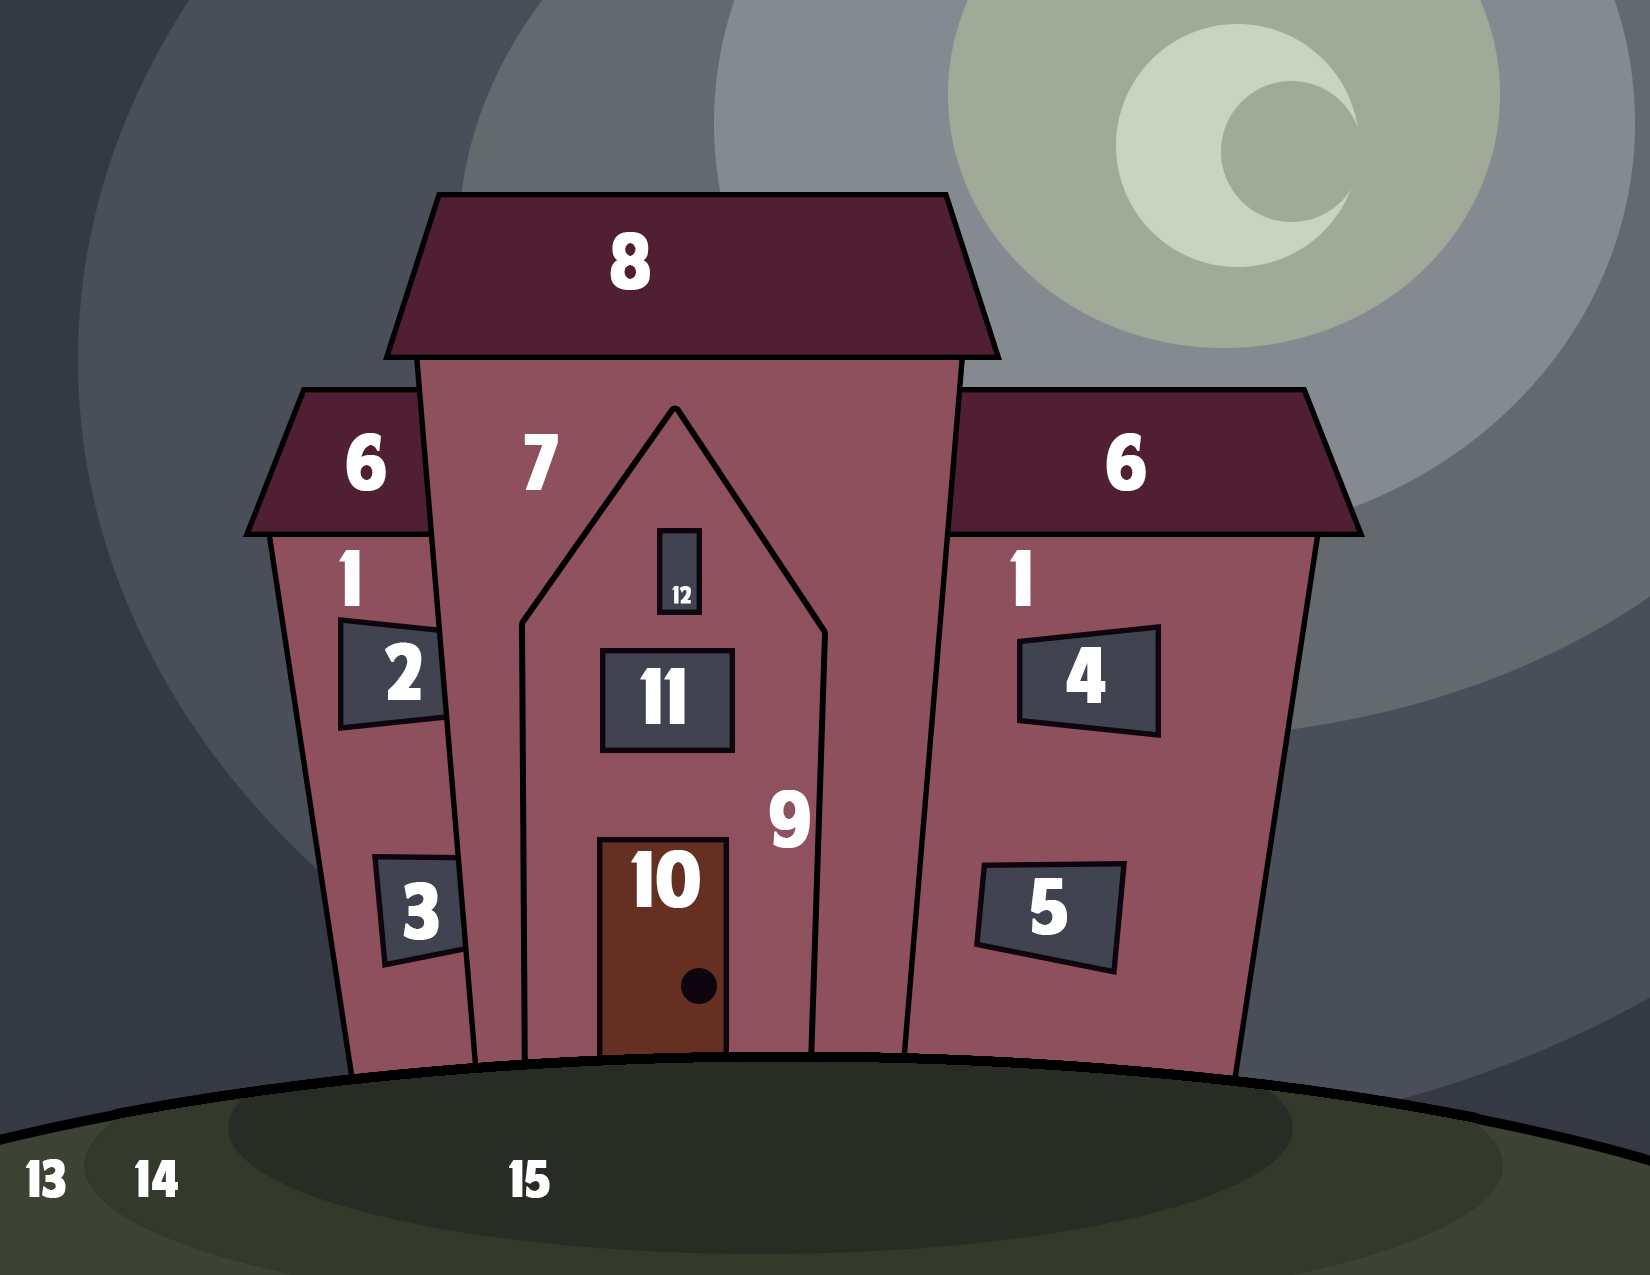
The objects are numbered in order that is easiest to create them (assuming I made no mistakes)
Use Eye Dropper to select the house color.
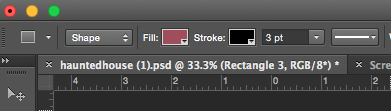
Use the Rectangle Shape Tool to create a large box that will be the biggest part of the house.
Make sure the setting for the shaper are as follows: Box color fill is the color of the house. The border should be black and 3 point width
The objects are numbered in order that is easiest to create them (assuming I made no mistakes)
Use Eye Dropper to select the house color.
Use the Rectangle Shape Tool to create a large box that will be the biggest part of the house.
Make sure the setting for the shaper are as follows: Box color fill is the color of the house. The border should be black and 3 point width
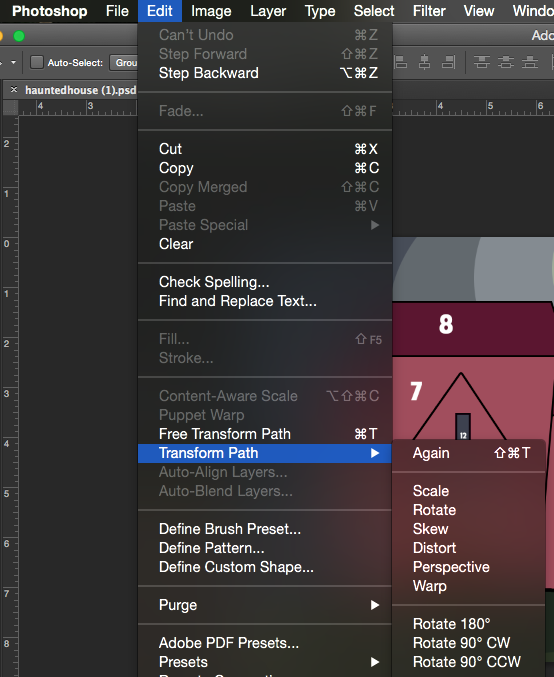
You will need to go to the top menu and select Edit - Transform - Perspective and squeeze the bottom together.
You will need to use the same process to create the windows, changing the fill color to gray, using perspective to squeeze the sides.
Create the roof of the house on top of the house so it hides the top portion of the house. Use the shape tool, change the color and use the Transform Perspective tool to squeeze the top.
Use the same steps to complete the rest of the house.
When you get to the shape with the door, you will use the Pen Tool
You will create the house looking shape with the Pen Tool.
Make sure the front color is set to the house color.
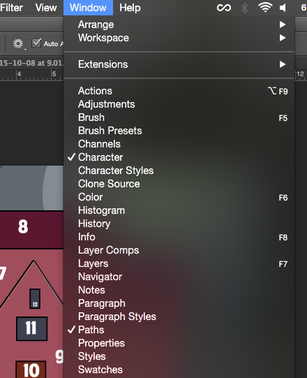
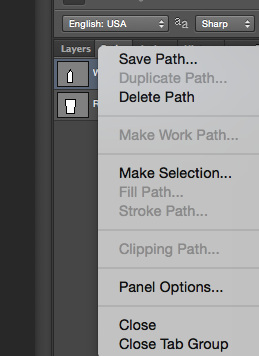
Go to Paths Menu and select Make Selection
Make sure the front color is set to the house color.
Go to Paths Menu and select Make Selection
|
|
Make a new layer
Use the Paint Bucket to fill the selection
Use the Paint Bucket to fill the selection
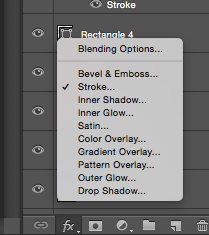
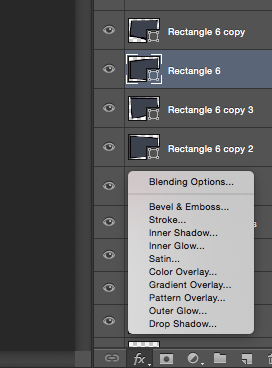
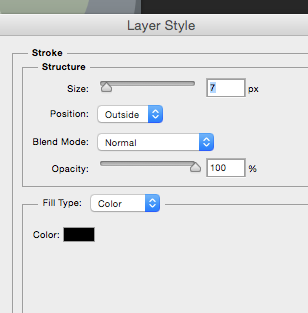
Use the FX menu at bottom of the layers and select Stroke to add a black 5 Point border around the shape.
Continue making the rest of the house with the Shape tool
Create a new layer and make the green grass using the Elliptical Selection tool, Eye Dropper, and Paint Bucket.
Then use the FX menu at the bottom of the layers to select Stroke to add a black 5 Point border around the shape.
When Finished:
Save with Image Resolution to 72 and as a JPEG and upload to your site.
For extra credit, you can add trees or add the extra stuff in the original photo.
